Knowledge
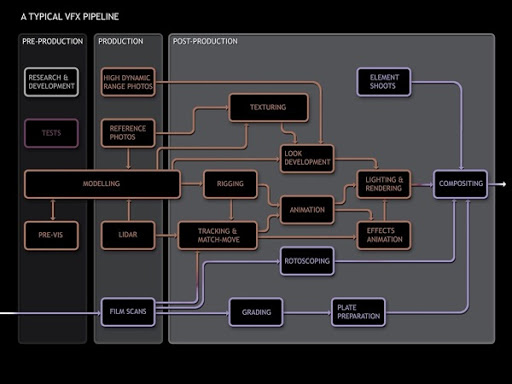
Outline the importance and methods of retaining the quality of the source material. Explain the general VFX shot pipeline, including general knowledge of all artists’ roles within the shot’s lifetime and their needs and deliverables. Plus, the film and/or TV shot pipeline, from preproduction, through shoot, editorial, VFX to grading. Furthermore, the VFX production pipeline, including shot bidding, turn-over, briefing, reviews, client reviews, deliveries and final delivery. Point out the different approaches to loading data from internal and external sources. Not leaving out delivery, output formats and visual effects terminology. In addition to, any familiarity with industry standard software packages e.g. Maya, Houdini, 3D Studio Max etc you may have.
Skills
Examples of selecting and using appropriate software tools and techniques. Demonstrating appropriate techniques to reduce degradation of the source material (for example colour correction concatenation and single step filtering on transformations). Whilst using appropriate VFX terminology and showing technical competence in at least one industry standard VFX software. Not forgetting to use FTP clients (tools to transfer computer files) and external hard drives to create at least one QuickTime video as an example. Demonstrating a good understanding and knowledge of package assets for client delivery.
The beginning of the process is when a production agency approaches a VFX company with a project to pitch. They will go through their plan for the project and what post production would be needed. It is then the VFX the turn of the company to come back to the agency with a quote, the time it will take to complete and at what cost. This will be done between many VFX houses to get the best deal for the production agency. It is vital to maintain the quality of assets and source material. When a company receives assets from clients to use in the project at times things such as game models may not hold up to close scrutiny closeup. This may the case that their pipeline is different to ours. The end product is what will be judged by the client and the audience at large so you will have to re texture or remodel part or all of the asset to the standard to achieve the aesthetic standard necessary. While quicktimes deliveries are sent to the client the final delivery is very much different. An in house editor at the studio working on it will go over it before and after grading to make sure everything is correctly cut and formatted for every standard of broadcast that the project has been agreed to be used as. When all of these checks are complete the studio will send every cut of the project in the formats agreed upon. This is called final delivery.
Pre-Production
This stage is mainly for proof of concept for the production agency, to get a basic blocked out feel for the ad in partnership with the VFX house. Depending on the scale of the project there can be a lot of time for R&D (Research and Development). This is where a lot of experiments take place by the VFX house to find the best method to achieve what has been asked of them. I have been working on a project currently in pre-production in which we are creating dogs that are wearing collars and will need saliva simulating. Based on the tests blocked out by the production team we know that the saliva will need to be able to break and withstand vigorous animated movement. I had previously done some saliva simulation on a Komodo Dragon and picked that set up up as a starting point.
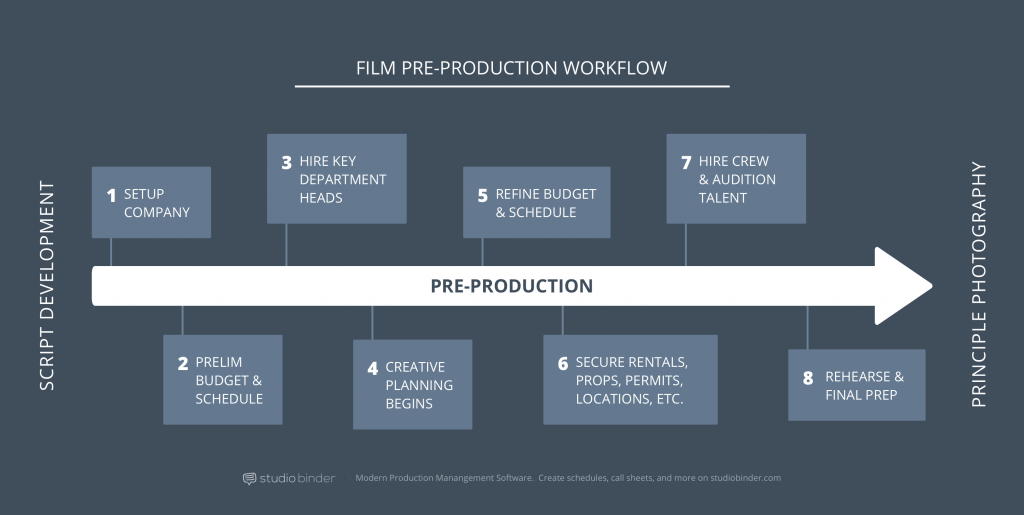
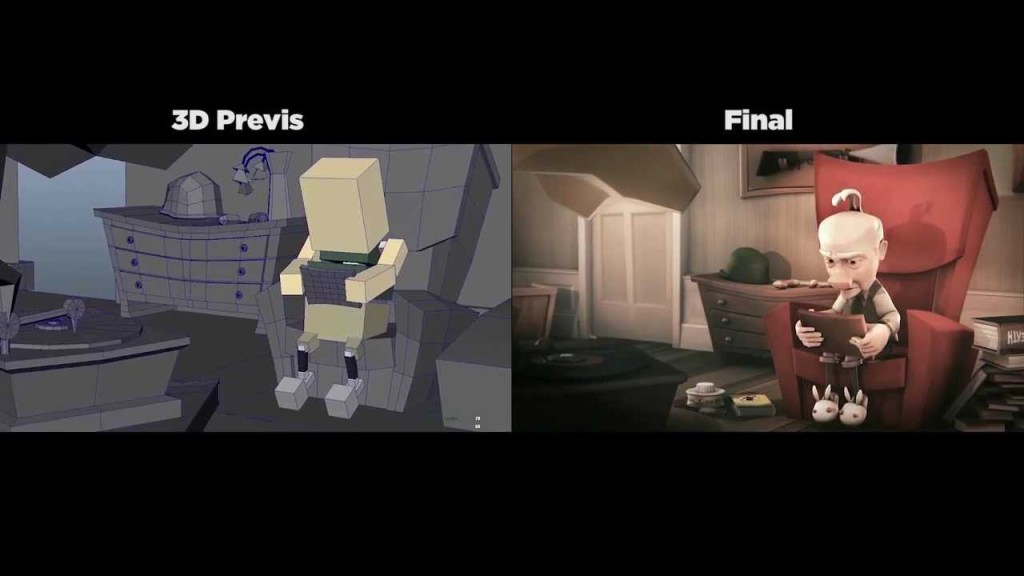
This is also where previs is used. The modellers riggers and animators will make less final assets and animate them to create a version of the proposed ideas for the clients. This version may include very basic shaders to capture the round about look but lighting and rendering is not usually focused on for a previs version.
Production
This is the on set stage of the project production pipeline. This is where the resources that are required in post production are gathered and acquired. They are shooting like any other film or television production based on the concepts and storyboards the 3D team lead has been corresponding with. When the company was bidding for this job they would have had to provide a estimate of what the job would cost the client to complete. Now with the finances wrapped up and the company chosen they are shooting every scene of the job as discussed from the very outset. The set HDRIs, backplates, reference imagery and sometimes scans are collated at this stage. HDRIs are created for set locations by taking photos with a very wide lens 360 degrees around a specific spot in set, usually the center. They are then stitched together using programs specific to the job like PTGui and then cleaned up and color neutralized in Nuke. This is a task I have done many times for multiple jobs sometimes with over 900 images from set. These HDRI images are then used for capturing set specific lighting for reflections and and projections for overall lighting. Backplates are the individual shots taken by the production crew for the project with the post production effects to be added. They sometimes use stand in props and actors to make it easier for the actors to act against. This is also to help the CG team to understand where in space assets should be applied. Reference imagery is any imagery used for reference by the post production team. These images are used as reference to create the assets such as body doubles and background props. LiDAR scans are also made of the set on set, they are used at times to accurately understand the spacial relations in the scene. Scans can also be used in conjunction with HDRIs for reflections and lighting. Before the production stage is over the shots collected will be edited down to what would have been agreed to be the length discussed. Each shot down to length would have been agreed upon and now they are being cut up into them. The company will receive the edit or potential if agreed multiple edits to work on in their DPX file format. The turn over stage is when the footage is sent from the client after the shoot. The footage is typically over scanned to allow for handles which can reduce errors. They also allow for slipping of frames. When originally sent they will also include in the footage the correct header data, source time code, and reel number. A list of reel and timecode data representing where each video clip will be placed is given. Then they will receive an offline, usually as a QuickTime to make sure our edit matches the one from edit.
Post Production
During post production, the team will have constant contact with the clients and will have annual reviews either in person or virtually. Quicktimes, dailies and WIPs are used when meetings can not take place in order for progress to still be tracked and communicated throughout the process. This is alongside reviews within the team as well, mostly once a week to reestablish where they are in a project and how much has been completed thus far. When working internationally with either clients or artists working overseas there are some challenges that you can face.
If the client is overseas then the production would have taken place there too. This means there is a timezone difference when communicationing while on set. Even if the the lead is there with them the other artists back here are in a different timezone when communicating with them too. They usually are using either Whatsapp or email and catching up as much as possible with some overlap in working hours making it easier at those times. When artists work form overseas as some do at the mill the same challenges can apply dependent on where they week from. At the Mill there is an artist that works from France which negates the issue of timezone but is obviously not always as easy as being bale to get up from your desk and talk to someone a row away or them coming over to help you one to one.
Concepts
Concept art is created in tandem with the clients to get an understanding early on of what kind of assets should be created and firstly R&D’d. These concept images are used throughout the pipeline as the basis of any creative decisions. Acting as a framework for the entire project. When on the Wizards Unite job we regularly referred to the concept art and what is called the offline of the ad. I found this really helpful to use as a guideline for how my work should look and feel. As this was an earlier job in my time too, the offline concept gave me an extra assurance that i was on track when creating the wand flip and glow FX. The offline is the ad edited into the final cut at the time but with place holder FX made quickly or cheaply using usually primarily 2D methods. This is used to give the overall feel of what the ad should be at the end with FX that represents what is agreed upon between the studio and client.
Modelling
The modellers now equipped with the concepts of the assets they must create an now begin their role in the project. They will use the finalized concepts to create the assets, still regularly communicating with the clients to make sure things are on the correct track. At times small changes may be made by the client through feedback or suggested by the 3D artists themselves because aspects that may have worked on paper may need to be tweaked to better fit the project or be more aesthetically pleasing.
Different programs and methods are used in this stage of production. Programs such as Maya, 3Ds Max, Z Brush and in the Design team also Cinema 4D. These are each used for different reasons and have different benefits for different types of assets. Hard surface modelling is usually done in Maya and 3DS Max, these programs have been created with is in mind and are staples in this discipline. Maya as of recent has been making more and more additions to its tools for more organic modelling and sculpting tools.
Z Brush is chiefly used for more organic modeling and is supremely powerful in this regard. This program can deal with tens and even hundreds of millions of polygons at a time in order to allow the artist to craft even the most complex of organic creations and characters. I have more recently found out the hard surface capabilities of Z Brush which there are many. There are many ways to create hard surface assets very quickly and effectively. This has been useful when bringing in hard surface assets to attach and assemble with organic assets. You are able to easy add or modify the asset without having to send it back for only minor changes.
C4D (cinema 4D) is used mostly by Design department artists where assets are usually more abstract. They are usually used with Houdini where some more procedural modelling can also take place easily. These programs seem to be preferred in this department, possibly because they allow for a very quick turnaround. Especially when concepting an entire scene of simple assets being used in conjunction with large scale effect that can be easily iterated where the scale of the effects are more important than the individual assets themselves.
I chiefly use Maya for the majority of my modelling or at the very least as my starting pint of any model I create. I do often like to use Z Brush for the detailing stage to hand paint on geometrical detail that can be difficult to box model. For some organic shaped assets I made for an Amazon job such as a bottle of pouring wine frozen in time, I created the bottle shape in Maya and used a long cylinder as a place holder wine stream. Then in Zbrush I embellished them with the detail needed and brought it aback to Maya for retopology. On the same job i made a milk swirl in a glass jug. I applied a similar methodology but using Houdini instead to create the milk swirl in a simulation. I exported a single frame of the sim that used the pre-modelled jug as a collision.
Texturing
At this stage the modelling and unwrapping of an asset must be complete and finalized. The UV unwrapping stage is done by the modeller when the model has been finished and signed off. This is usually done in the program they created it in. In Z Brush they may need to be retopologised either in that application of using quad draw retopology in Maya. The texturing process heavily relies on the UVs being unwrapped well and effectively. This most importantly is about creating effective seams that are both hidden but also do not disturb the flow of assets texture. UDIM management can also be very important. A very detailed asset or one that will be very close to camera and under more scrutiny may have its UVs spread across several UDIM tiles. This is in order to allow for a higher resolution texture to be applied to each part of the model.
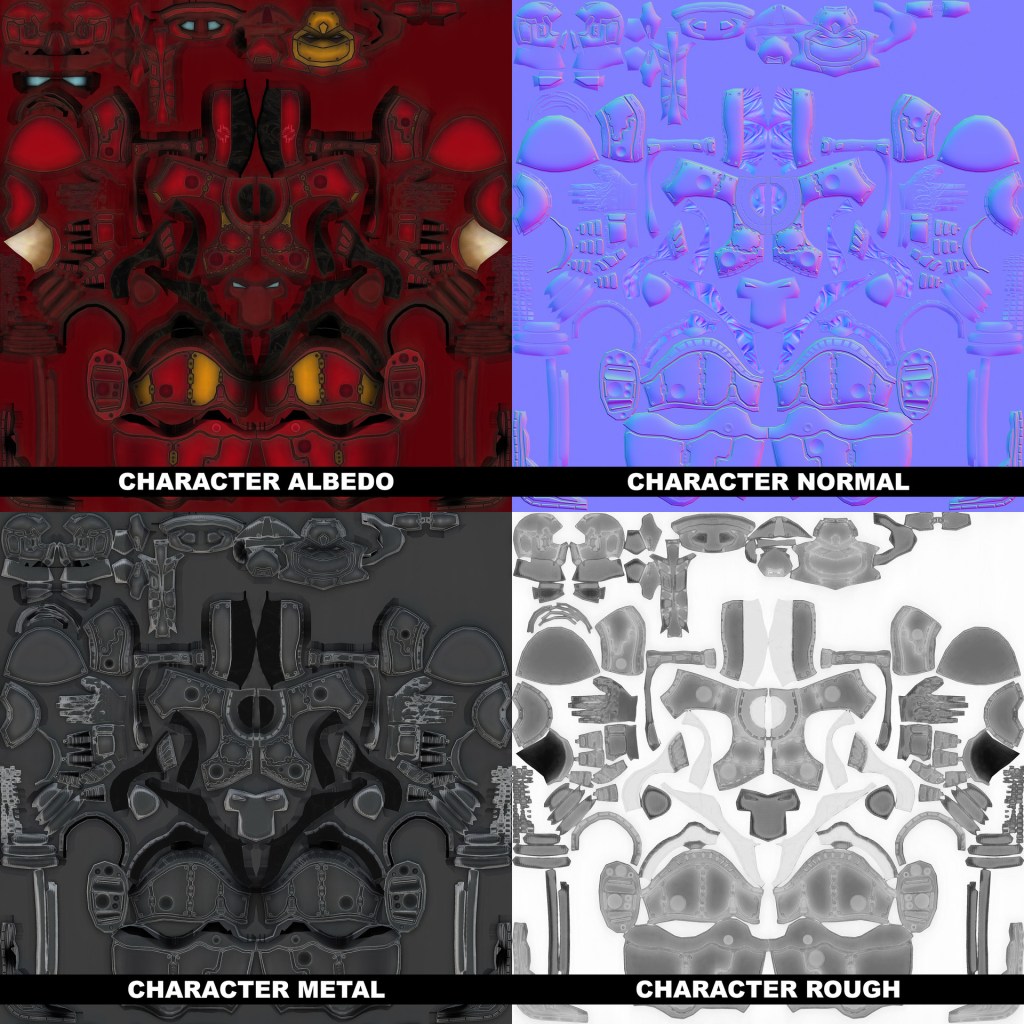
The most popular texturing programs are Substance Painter and Mari. Much of the texturing can be done in the creation application too. Sometimes all the texturing can be done in the modelling application using methods such the Hypershade node network. When texturing is done in another program it is exported out of the modelling application and focused on in the respective software. The texturing program will usually export out texture maps for you to apply back in the creation program. These maps usually include diffuse, specular, normal and sometimes metallic, height and emission maps are also created and exported directly from the program.
Lookdev
Lookdev or look development is the process of texturing assets and rendering them with different lighting conditions and techniques in order to recreate and experiment with replicating the lighting from the scene in question. When being tested animated turntables are often created to send to clients. These are then given feedback. Based on this feedback sometimes things about the original model will have to be changed. The client may think with everything taken into account fundamentally the asset needs to be taken into a new or slightly new direction. At the Mill we have a set of skydomes that are used throughout all 3D packages. I usually use the cloudy outdoor one for most of my assets because find it the most balanced lighting wise. If I don’t know what location the asset will be used in exactly, then I choose the cloudy outdoor skydome. I feel it adds the least color and changes the assets colour and feel the least to properly assess in the most neutral environment.
Rigging and Animation
The rigging and animation stage usually happens in tandem with one another. These two teams work extremely closely. Most 3D packages can be used for both these disciplines some with their own methods respectively. The riggers just need the asset published with the correct scale and standardaised components the pipeline requires.The riggers essentially add bone structure and controllers to assets in order for them to be animated. The structure of the bones is done with animation in mind and will usually directly include correspondence with the animator directly. The controllers that are created will also be made depending on the amount the asset will be doing in shot and how close they are to the camera. The asset may need to be animated with more detail such as facially if they are close enough to camera to have their face read by the audience as well as whatever their primary function is in the shot.
FX
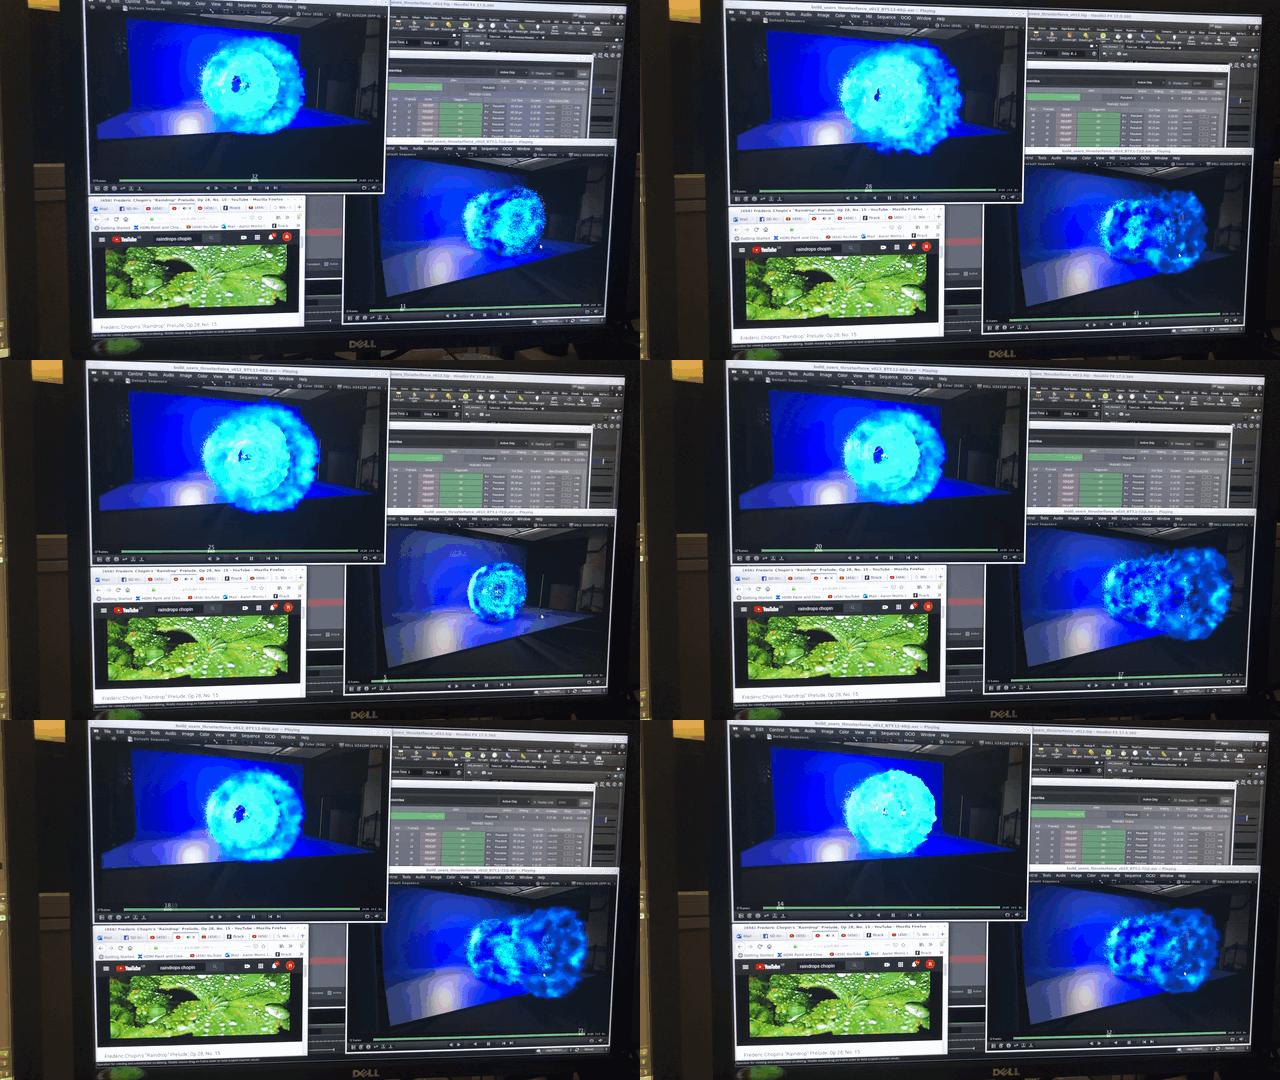
FX, is the stage where effects are implemented into the shot. This departments responsibilities can range from water and pyro to muscle and fat simulation. The primary software for this discipline is Houdini. Most 3D packages include am FX shelf with functionality to create effects or simulate but most have drawbacks in performance, iteration and procedural capabilities compared to Houdini currently. The procedural nature of the program also makes it so artists can not only see where things maybe acting strangely more easily by disabling and abling nodes individually. The procedural nature also makes it easier to replicate effects in the FX in sequences and throughout large FX far far easier. It has a non destructive simulation workflow which allows for repeat iterations of an effect without permanent affect to the geometry. This is a realm I have been recently training in more, creating FX such as ship thrusters and more recently R&Ding foam and saliva for animals. This more recent exploration into this part of the pipeline has given me a glimpse into the time constraint and iterative process of being a part of this department. I previously thought they were an extension of the asset team because they mostly use the assets for the FX. I have realised now though that they are a more independent and crucial part of the 3D workforce just like riggers or animators. Skin, muscle and fat deformation or shots where the FX are the primary focus are completely reliant on this department to create and achieve the end result.
Lighting and Rendering
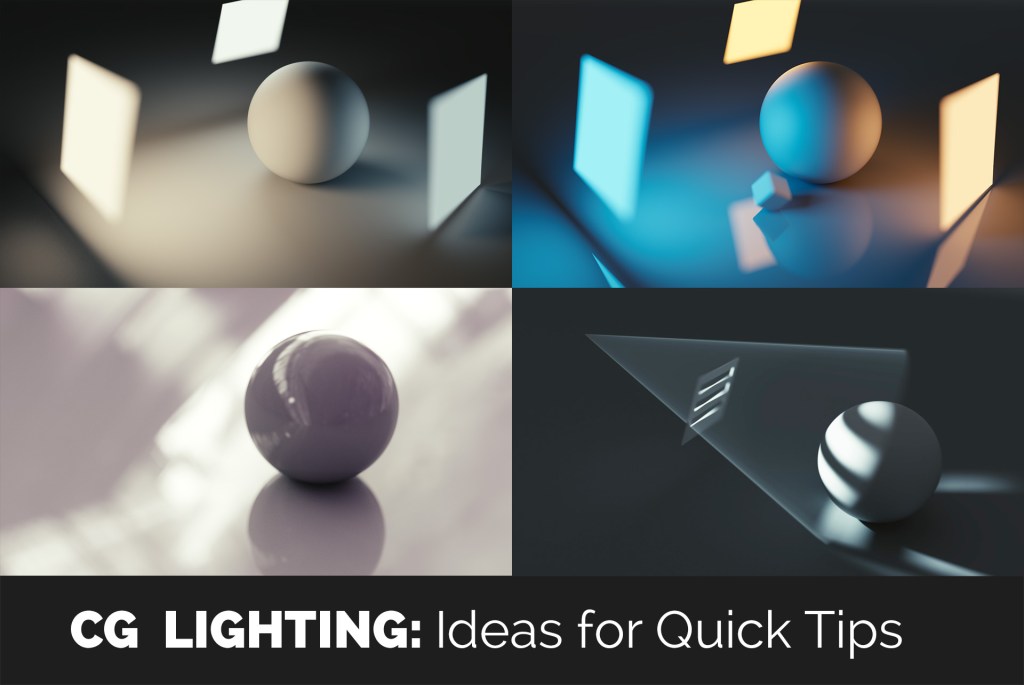
The lighters and renderers jobs are to replicate and accentuate the lighting and visual conditions that would affect the scene and assets if they were present in the shot originally. At this stage everything involved in each individual shot will have its own scene and will be staged and in place just needing to be lit and rendered out and given to the 2D department.
This scene is usually viewed through the camera tracked 3D camera present in the scene. This camera would have been created at the start of pre-production from the raw camera movement shot for the shot in question. 3D Equalizer is the most commonly used 3D tracking software and the software i have used to create 3D tracks on respective projects. I find this to be a difficult task which requires a lot of patience. A large understanding of cameras is also needed to accurately assess the quality of the track created.
The HDRIs and reference imagery will now be used to match the shot lighting and use it light the objects in the scene in respect to where they would be in 3D space on set. the HDRIs would have been neutralized against a Macbeth chart that is shot on set as part of the shot so that the resulting HDRIs lighting matches perfectly color wise. These subtitles are key for accomplishing accurate and realistic lighting. Without these techniques the lighting is being don completely by eye and can leave the assets feeling as though they aren’t present in the world as their lighting position does not line up and the human eye can distinguish this.
Rendering is the completion of this process where the lighting and and the aspects being rendered are put on what is known as render layers. This is where aspects like sample amounts which control how many render passes or enabling and amounts of motion blur as well as output resolution take place are controlled and tuned. This determines the potential quality of elements of like the FX in the final render of the shot.
From my experience with this stage, particularly in a studio pipeline this is a laborious process where if you configure a setting incorrectly or do not account for a render setting that needs attention you may not realise until the entire render is complete. This can take hours or at times days. A work around that can sometimes be helpful is to render out a single frame as a test to see if the initial outcome on that frame meets the aesthetic requirements. This method however is not a guarantee as if assets are animated to move then you can not account for how they may need attention based on a single stationary frame.
Compositing and Grading
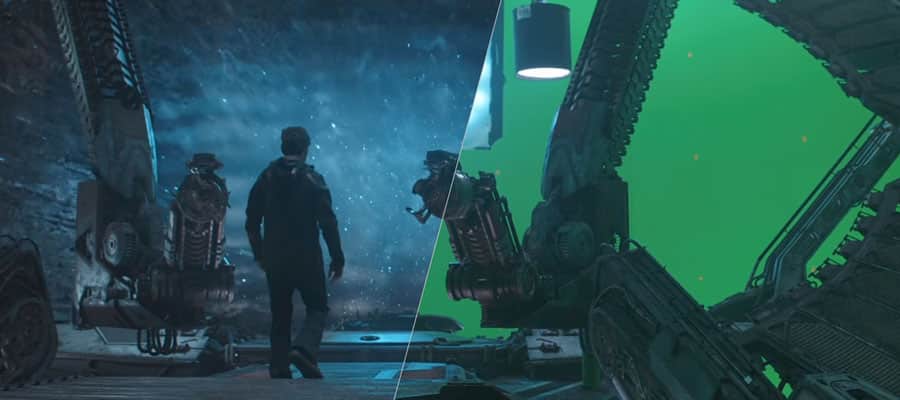
Finally at this stage the 2D department take over. They receive the rendered out shots and blend all of the 3D elements seamlessly into the live action backplate while maintaining the source quality of the images.. For this task the two most prominent software are Nuke and Flame.
The plates are usually first “cleaned” and “roto’d”. 2D painters will “clean” the backplate by using tools to remove anything from the backplate that the client does not want to be present i the final shot but existed in the location where the shot was filmed. This can include anything form graffiti to entire buildings or trees in the background of a shot. Then the aspects of live action that should not be affected by the 3d elements being brought in to the shot are “roto’d”. This is when tools are used to select and mask those elements individually and placed in layers that isolate them to be tuned on how much they are affected by any other element independently.
Render passes and cryptomattes created and exported by the renderers are essential to 2D artists. These layers contain specific components such as just the shadows or just the backgrounds as a visual card. A pass could for example contain the grass or blue sky. The direction from the client to the 2D artist could be to make the grass greener or the sky bluer. By using that specific pass and colour correction to isolate that component of the shot without effecting any other this is easily possible. This reduces the degradation of the source material cleverly. This can be accomplished in another way but is far more easily accomplished using passes and cryptomattes. At times they specifically requested by the 2D artists from the renderers with these potentially fore-mentioned tweaks in mind. They use these passes and layers in an attempt to capture the look and feel of the real life cine camera lens that captured the live action plate the 3D is sitting atop. They also use color correction
The grading team is then the next to get their hands on the composted project. The will colour grade the project to the clients liking. Usually their is a chief grader that heads up the entire grade dependent on length of project. The clients are usually present for all the sessions in a dark room to be a part of this process and make decisions. In some cases things from this stage can bounce back to the compositors to be tweaked slightly. Colours of elements of the shot may be changes to fit the overall grade better and sent back to be graded once again.
 ATD Apprentice